Chapter 14 Interactive Tutorials
The learnr package [30] makes it easy to turn any R Markdown document into an interactive tutorial. Tutorials consist of content along with interactive components for checking and reinforcing understanding. Tutorials can include any or all of the following:
-
Narrative, figures, illustrations, and equations.
-
Code exercises (R code chunks that users can edit and execute directly).
-
Quiz questions.
-
Videos (currently supported services include YouTube and Vimeo).
-
Interactive Shiny components.
Tutorials automatically preserve work done within them, so if a user works on a few exercises or questions and returns to the tutorial later, they can pick up right where they left off.
This chapter is only a brief summary of learnr’s full documentation at https://rstudio.github.io/learnr/. If you are interested in building more sophisticated tutorials, we recommend that you read the full documentation.
Section 14.1 Get started
To create a learnr tutorial, first install the learnr package with:
install.packages("learnr")
Then you can select the “Interactive Tutorial” template from the “New R Markdown” dialog in the RStudio IDE (see Figure 14.1).
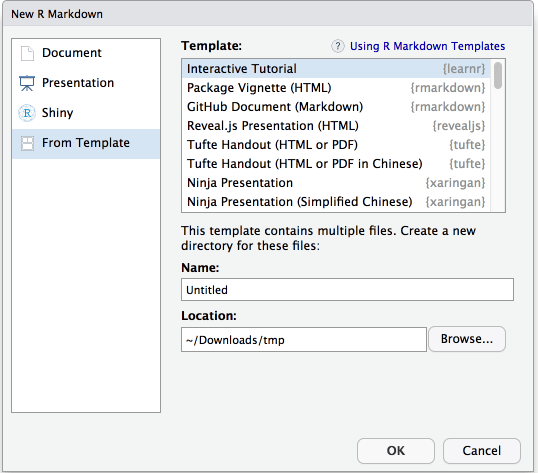
Create an interactive tutorial in RStudio.
If you do not use RStudio, it is also easy to create a tutorial: add
runtime: shiny_prerendered and the output format learnr::tutorial to the YAML metadata, use library(learnr) within your Rmd file to activate the tutorial mode, and then add the chunk option exercise = TRUE to turn code chunks into exercises. Your tutorial users can edit and execute the R code and see the results right within their web browser.
Below is a minimal tutorial example:
---
title: "Hello, Tutorial!"
output: learnr::tutorial
runtime: shiny_prerendered
---

```{r setup, include=FALSE}
library(learnr)
```

This code computes the answer to one plus one, change it
so it computes two plus two:

```{r addition, exercise=TRUE}
1 + 1
```
To run this tutorial, you may hit the button “Run Document” in RStudio, or call the function
rmarkdown::run() on this Rmd file. Figure 14.2 shows what the tutorial looks like in the browser. Users can do the exercise by editing the code and running it live in the browser.
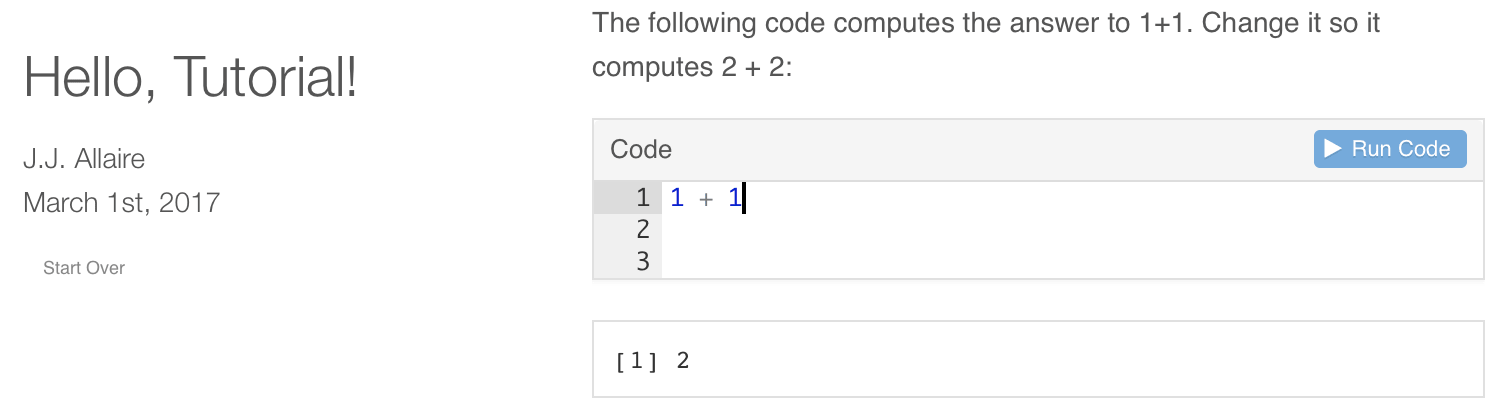
A simple example tutorial.
We strongly recommend that you assign unique chunk labels to exercises (e.g., the above example used the label
addition), because chunk labels will be used as identifiers for learnr to save and restore user work. Without these identifiers, users could possibly lose their work in progress the next time when they pick up the tutorial.
Section 14.2 Tutorial types
There are two main types of tutorial documents:
-
Tutorials that are mostly narrative and/or video content, and also include some runnable code chunks. These documents are very similar to package vignettes in that their principal goal is communicating concepts. The interactive tutorial features are then used to allow further experimentation by the reader.
-
Tutorials that provide a structured learning experience with multiple exercises, quiz questions, and tailored feedback.
The first type of tutorial is much easier to author while still being very useful. These documents will typically add
exercise = TRUE to selected code chunks, and also set exercise.eval = TRUE so the chunk output is visible by default. The reader can simply look at the R code and move on, or play with it to reinforce their understanding.
The second type of tutorial provides much richer feedback and assessment, but also requires considerably more effort to author. If you are primarily interested in this sort of tutorial, there are many features in learnr to support it, including exercise hints and solutions, automated exercise checkers, and multiple choice quizzes with custom feedback.
The most straightforward path is to start with the first type of tutorial (executable chunks with pre-evaluated output), and then move into more sophisticated assessment and feedback over time.
Section 14.3 Exercises
Exercises are interactive R code chunks that allow readers to directly execute R code and see its results. We have shown a simple exercise in Figure 14.2.
Exercises can include hints or solutions as well as custom checking code to provide feedback on user answers.
Subsection 14.3.1 Solutions
To create a solution to an exercise in a code chunk with the chunk label
foo, you add a new code chunk with the chunk label foo-solution, e.g.,
```{r filter, exercise=TRUE}
# Change the filter to select February rather than January
nycflights <- filter(nycflights, month == 1)
```

```{r filter-solution}
nycflights <- filter(nycflights, month == 2)
```
When a solution code chunk is provided, there will be a
Solution button on the exercise (see Figure 14.3). Users can click this button to see the solution.
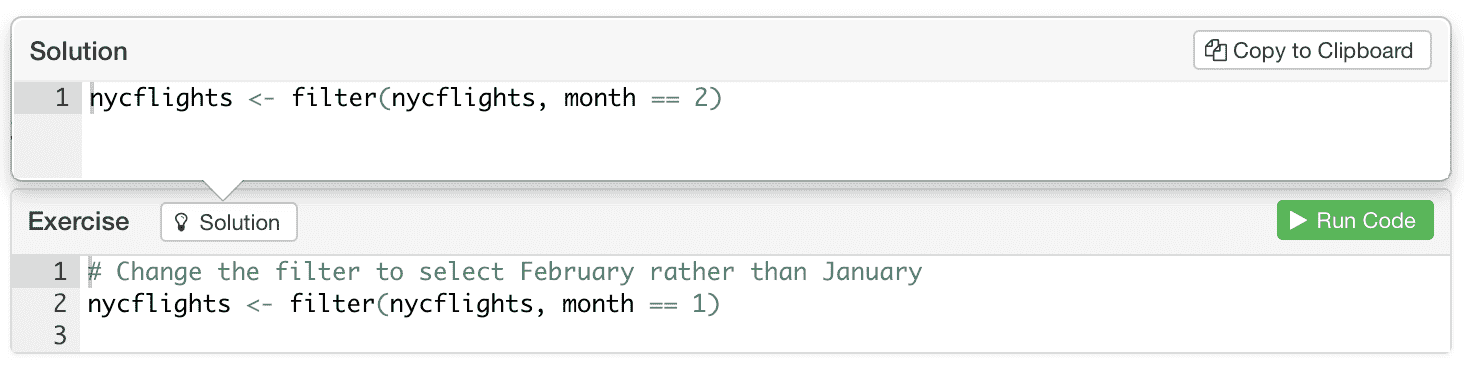
A solution to an exercise.
Subsection 14.3.2 Hints
Sometimes you may not want to give the solutions directly to students, but provide hints instead to guide them. Hints can be either Markdown-based text content or code snippets.
To create a hint based on custom Markdown content, add a
<div> tag with an id attribute that marks it as hint for your exercise (e.g., filter-hint). For example:
```{r filter, exercise=TRUE}
# filter the flights table to include only United and
# American flights
flights
```

<div id="filter-hint">
**Hint:** You may want to use the dplyr `filter` function.
</div>
The content within the
<div> will be displayed underneath the R code editor for the exercise whenever the user presses the Hint button.
If your Pandoc version is higher than 2.0 (check
rmarkdown::pandoc_version()), you can also use the alternative syntax to write the <div>:
:::{#filter-hint}
**Hint:** You may want to use the dplyr `filter` function.
:::
To create a hint with a code snippet, you add a new code chunk with the label suffix
-hint, e.g.,
```{r filter, exercise=TRUE}
# filter the flights table to include only United and
# American flights
flights
```

```{r filter-hint}
filter(flights, ...)
```
You can also provide a sequence of hints that reveal progressively more of the solution as desired by the user. To do this, create a sequence of indexed hint chunks (e.g.,
-hint-1, -hint-2, -hint-3, etc.) for your exercise chunk. For example:
```{r filter, exercise=TRUE}
# filter the flights table to include only United and
# American flights
flights
```

```{r filter-hint-1}
filter(flights, ...)
```

```{r filter-hint-2}
filter(flights, UniqueCarrier == "AA")
```

```{r filter-hint-3}
filter(flights, UniqueCarrier == "AA" | UniqueCarrier == "UA")
```
Section 14.4 Quiz questions
You can include one or more multiple-choice quiz questions within a tutorial to help verify that readers understand the concepts presented. Questions can either have a single or multiple correct answers.
Include a question by calling the
question() function within an R code chunk, e.g.,
```{r letter-a, echo=FALSE}
question("What number is the letter A in the English alphabet?",
  answer("8"),
  answer("14"),
  answer("1", correct = TRUE),
  answer("23")
)
```
Figure 14.4 shows what the above question would look like within a tutorial.
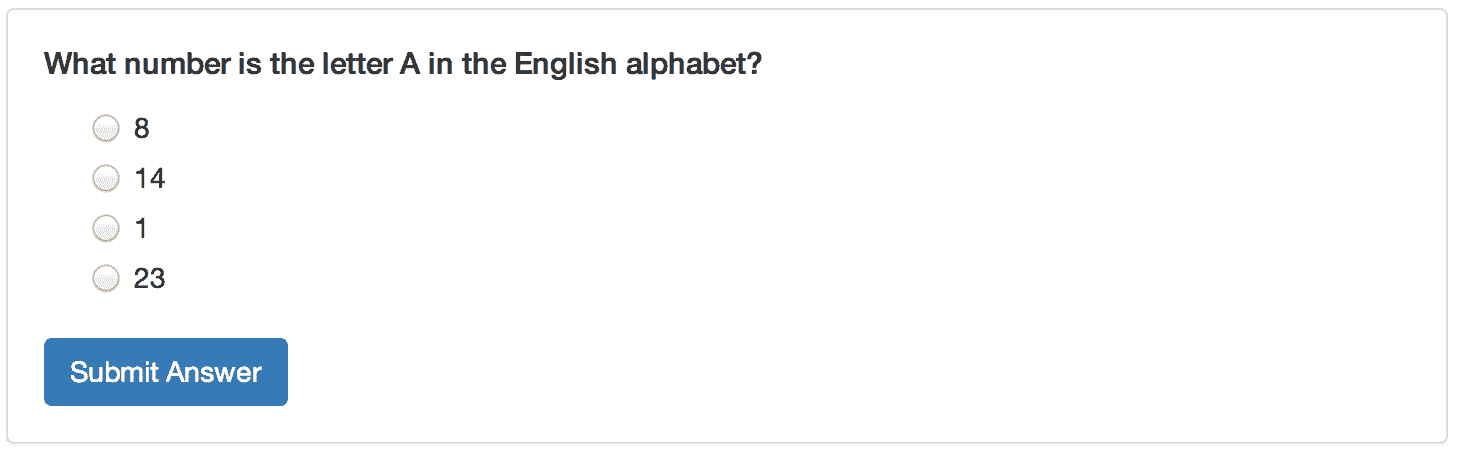
A question in a tutorial.
The functions
question() and answer() have several other arguments for more features that allow you to customize the questions and answers, such as custom error messages when the user’s answer is wrong, allowing users to retry a question, multiple-choice questions, and multiple questions in a group. See their help pages in R for more information.
Section 14.5 Videos
You can include videos published on either YouTube or Vimeo within a tutorial using the standard Markdown image syntax. Note that any valid YouTube or Vimeo URL will work. For example, the following are all valid examples of video embedding:


Videos are responsively displayed at 100% of their container’s width (with height automatically determined based on a 16x9 aspect ratio). You can change this behavior by adding attributes to the Markdown code where you reference the video.
You can specify an alternate percentage for the video’s width or an alternate fixed width and height. For example:
{width="90%"}
{width="560" height="315"}
Section 14.6 Shiny components
Tutorials are essentially Shiny documents, which we will introduce in Chapter 19. For that reason, you are free to use any interactive Shiny components in tutorials, not limited to exercises and quiz questions.
The Shiny UI components can be written in normal R code chunks. For the Shiny server logic code (rendering output), you need to add a chunk option
context="server" to code chunks. For example:
```{r, echo=FALSE}
sliderInput("bins", "Number of bins:", 30, min = 1, max = 50)
plotOutput("distPlot")
```

```{r, context="server"}
output$distPlot = renderPlot({
  x = faithful[, 2]  # Old Faithful Geyser data
  bins = seq(min(x), max(x), length.out = input$bins + 1)
  hist(x, breaks = bins, col = 'darkgray', border = 'white')
})
```
Again, since tutorials are Shiny applications, they can be deployed using the same methods mentioned in Section 19.2.
Section 14.7 Navigation and progress tracking
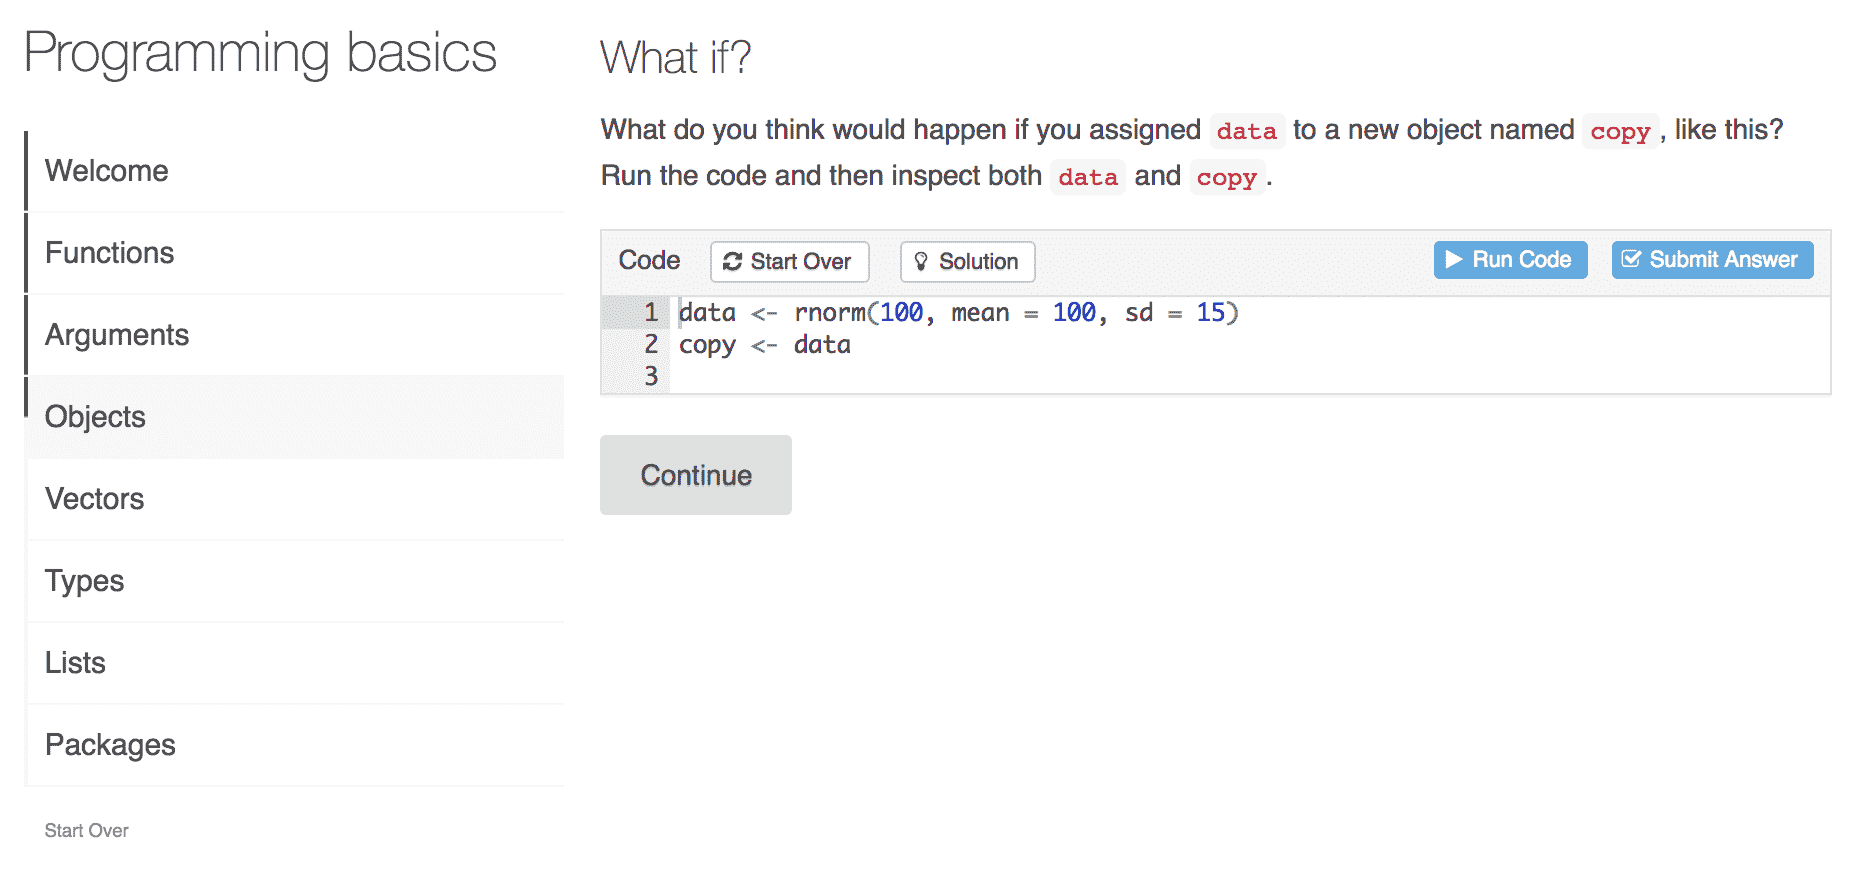
Keeping track of the student’s progress in a tutorial.
---
title: "Programming basics"
output:
  learnr::tutorial:
    progressive: true
    allow_skip: true
runtime: shiny_prerendered
---
