Chapter 7 xaringan Presentations
We have introduced a few HTML5 presentation formats in Chapter 4. The xaringan package [35] is an R Markdown extension based on the JavaScript library remark.js (
https://remarkjs.com) to generate HTML5 presentations of a different style. See Figure 7.1 for two sample slides.

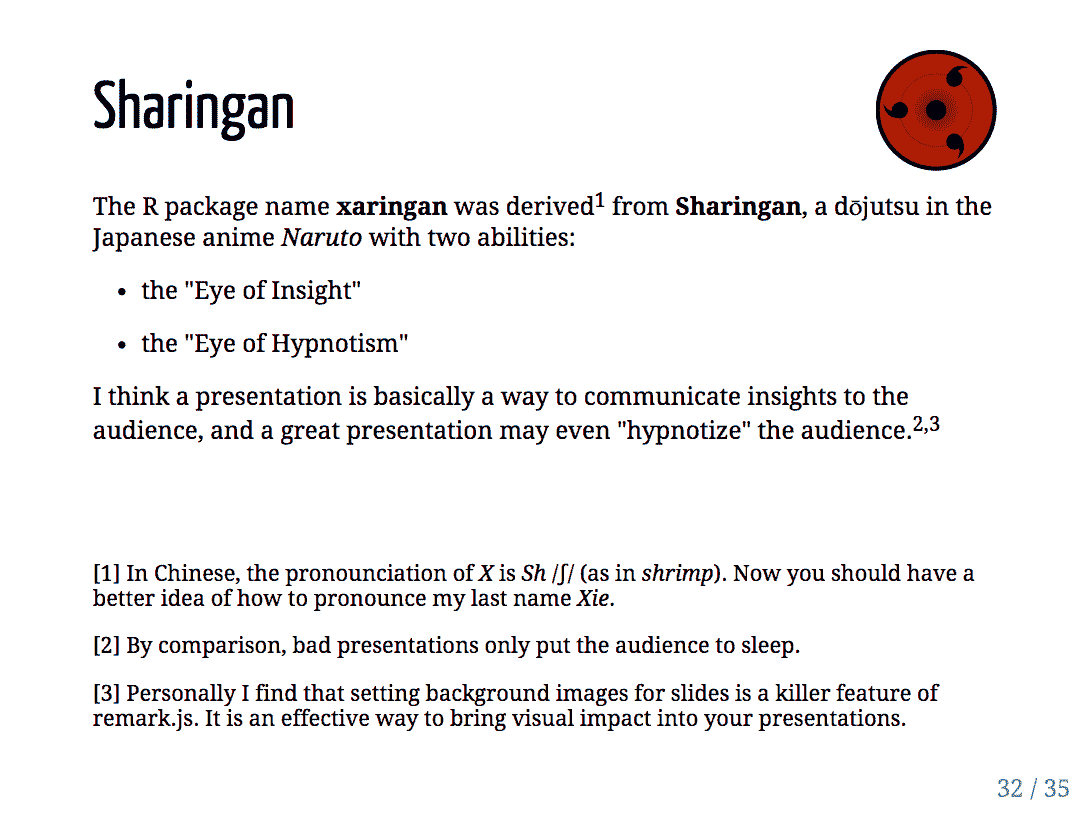
Two sample slides created from the xaringan package.
The name "xaringan" came from Sharingan ( The concern was somewhat naive, because the style is actually very customizable, and users started to contribute more themes to the package later.
http://naruto.wikia.com/wiki/Sharingan) in the Japanese manga and anime "Naruto". The word was deliberately chosen to be difficult to pronounce for most people (unless you have watched the anime), because its author (me) loved the style very much, and was concerned that it would become too popular.1
The main reason I stopped using LaTeX Beamer slides was because of its popularity: when you attend academic conferences, you see Beamer slides everywhere.
The xaringan package is based on the JavaScript library remark.js (
https://remarkjs.com); remark.js only supports Markdown, and xaringan added the support for R Markdown as well as other utilities to make it easier to build and preview slides.
You can learn more about the background stories and the usage of the xaringan package from the documentation at
http://slides.yihui.name/xaringan/, which is actually a set of slides generated from xaringan. You may also read a potentially biased blog post of mine to know why I preferred xaringan / remark.js for HTML5 presentations: https://yihui.name/en/2017/08/why-xaringan-remark-js/.
Section 7.1 Get started
You can install either the CRAN version or the development version on GitHub (
https://github.com/yihui/xaringan):
# install from CRAN
install.packages('xaringan')

# or GitHub
devtools::install_github('yihui/xaringan')
If you use RStudio, it is easy to get started from the menu
File -> New File -> R Markdown -> From Template -> Ninja Presentation, and you will see an R Markdown example in the editor. Press the Knit button to compile it, or use the RStudio addin Infinite Moon Reader to live preview the slides: every time you update and save the Rmd document, the slides will be automatically reloaded.
The main R Markdown output format in this package is
moon_reader(). See the R help page ?xaringan::moon_reader for all possible configurations. Below is a quick example:
---
title: "Presentation Ninja"
subtitle: "with xaringan"
author: "Yihui Xie"
date: "2016/12/12"
output:
  xaringan::moon_reader:
    lib_dir: libs
    nature:
      highlightStyle: github
      countIncrementalSlides: false
---

One slide.

---

Another slide.
Section 7.2 Keyboard shortcuts
After opening slides generated from xaringan or remark.js, you may press the key
h (Help) or ? on your keyboard to learn all possible keyboard shortcuts, which may help you better present your slides.
-
You may press
Hometo go to the first slide, orEndto go to the last slide, if you have these keys. -
Typing a number and pressing
Return(orEnter), you can jump to a specific slide with that page number. -
Press
bto black out a slide, andmto "mirror" a slide (reverse everything on the slide). These techniques can be useful when you do not want the audience to read the slide, e.g., when you have solutions on a slide but do not want to show them to your students immediately. I encourage you to trym; it can be a lot of fun. You can press these keys again to resume the normal slide. -
Press
fto toggle the fullscreen mode. -
Press
cto clone the slides to a new browser window; slides in the two windows will be in sync as you navigate through them. Presspto toggle the presenter mode. The presenter mode shows thumbnails of the current slide and the next slide on the left, presenter notes on the right (see Section Subsection 7.3.5), and also a timer on the top right. The keyscandpcan be very useful when you present with your own computer connected to a second screen (such as a projector). On the second screen, you can show the normal slides, while cloning the slides to your own computer screen and using the presenter mode. Only you can see the presenter mode, which means only you can see presenter notes and the time, and preview the next slide. You may presstto restart the timer at any time.
Section 7.3 Slide formatting
The remark.js Wiki contains detailed documentation about how to format slides and use the presentation (keyboard shortcuts). The xaringan package has simplified several things compared to the official remark.js guide, e.g., you do not need a boilerplate HTML file, you can set the autoplay mode via an option of
moon_reader(), and LaTeX math basically just works.
Please note that remark.js has its own Markdown interpreter that is not compatible with Pandoc’s Markdown converter, so you will not be able to use any advanced Pandoc Markdown features (e.g., the citation syntax
[@key]). You may use raw HTML when there is something you desire that is not supported by remark.js. For example, you can generate an HTML table via knitr::kable(head(iris), 'html').
Subsection 7.3.1 Slides and properties
Every new slide is created under three dashes (
---). The dashes must be directly followed by a line break, and there must not be any other characters after the dashes (not even white spaces). When you see that you new slide appear on the previous slide after a horizontal rule, you might have white spaces after the three dashes (if so, you have to delete them).
The content of the slide can be arbitrary, e.g., it does not have to have a slide title, and if it does, the title can be of any level you prefer (
#, ##, or ###).
A slide can have a few properties, including
class and background-image, etc. Properties are written in the beginning of a slide, e.g.,
---

class: center, inverse
background-image: url("images/cool.png")

# A new slide

Content.
The
class property assigns class names to the HTML tag of the slide, so that you can use CSS to style specific slides. For example, for a slide with the inverse class, you may define the CSS rules (to render text in white on a dark background):
.inverse {
  background-color: #272822;
  color: #d6d6d6;
  text-shadow: 0 0 20px #333;
}
---
output:
  xaringan::moon_reader:
    css: "my-style.css"
---
Actually the style for the
inverse class has been defined in the default theme of xaringan, so you do not really need to define it again unless you want to override it.
Other available class names are
left, center, and right for the horizontal alignment of all elements on a slide, and top, middle, and bottom for the vertical alignment.
Background images can be set via the
background-image property. The image can be either a local file or an online image. The path should be put inside url(), which is the CSS syntax. You can also set the background image size and position, e.g.,
background-image: url("`r '\x60r xaringan:::karl\x60'`")
background-position: center
background-size: contain
All these properties require you to understand CSS. In the above example, we actually used an inline expression
2
There are many tutorials online if you search for "CSS background", e.g.,
https://www.w3schools.com/cssref/css3_pr_background.asp.
xaringan::karl to return a URL of an image of Karl Broman (http://kbroman.org), which is one of the highlights of the xaringan package.
Subsection 7.3.2 The title slide
There is a special slide, the title slide, that is automatically generated from the YAML metadata of your Rmd document. It contains the title, subtitle, author, and date (all are optional). This slide has the classes
inverse, center, middle, and title-slide by default, which looks like the left image in Figure 7.1. If you do not like the default style, you may either customize the .title-slide class, or provide a custom vector of classes via the titleSlideClass option under the nature option, e.g.,
---
output:
  xaringan::moon_reader:
    nature:
      titleSlideClass: ["right", "top", "my-title"]
---
You can also disable the automatic title slide via the
seal option and create one manually by yourself:
---
output:
  xaringan::moon_reader:
    seal: false
---

# My Own Title

### Author

Whatever you want to put on the title slide.
Subsection 7.3.3 Content classes
You can assign classes to any elements on a slide, too. The syntax is
.className[content]. This is a very powerful feature of remark.js, and one of very few features not available in Pandoc. Basically it makes it possible to style any elements on a slide via CSS. There are a few built-in content classes, .left[ ], .center[ ], and .right[ ], to align elements horizontally on a slide, e.g., you may center an image:
.center[]
The content inside
[ ] can be anything, such as several paragraphs, or lists. The default theme of xaringan has provided four more content classes:
-
.left-column[ ]and.right-column[ ]provide a sidebar layout. The left sidebar is narrow (20% of the slide width), and the right column is the main column (75% of the slide width). If you have multiple level-2 (##) or level-3 (###) headings in the left column, the last heading will be highlighted, with previous headings being grayed out. -
.pull-left[ ]and.pull-right[ ]provide a two-column layout, and the two columns are of the same width. Below is an example:.pull-left[ - One bullet. - Another bullet. ] .pull-right[  ]
You can design your own content classes if you know CSS, e.g., if you want to make text red via
.red[ ], you may define this in CSS:
.red { color: red; }
Subsection 7.3.4 Incremental slides
When you want to show content incrementally on a slide (e.g., holding a funny picture until the last moment), you can use two dashes to separate the content. The two dashes can appear anywhere except inside content classes, so you can basically split your content in any way you like, e.g.,
---
# Two dashes
The easiest way to build incremental slides is...
--
to use two dashes `--` to separate content on a slide.
--
You can divide a slide in _any way you want_.
--
- One bullet
- Another bullet
--
- And one more
--
.center[

Don't saw your slides too hard.
]
There are a few other advanced ways to build incremental slides documented in the presentation at
https://slides.yihui.name/xaringan/incremental.html.
Subsection 7.3.5 Presenter notes
You can write notes for yourself to read in the presenter mode (press the keyboard shortcut
p). These notes are written under three question marks ??? after a slide, and the syntax is also Markdown, which means you can write any elements supported by Markdown, such as paragraphs, lists, images, and so on. For example:
---

The holy passion of Friendship is of so sweet and steady
and loyal and enduring a nature that it will last through
a whole lifetime...

???

_if not asked to lend money_.

--- Mark Twain
A common mistake in presentations, especially for presenters without much experience, is to stuff a slide with too much content. The consequence is either a speaker, out of breath, reading the so many words out loud, or the audience starting to read the slides quietly by themselves without listening. Slides are not papers or books, so you should try to be brief in the visual content of slides but verbose in verbal narratives. If you have a lot to say about a slide, but cannot remember everything, you may consider using presenter notes.
I want to mention a technical note about the presenter mode: when connecting to a projector, you should make sure not to mirror the two screens. Instead, separate the two displays, so you can drag the window with the normal view of slides to the second screen. Figure 7.2 shows how to do it from the "System Preferences" on macOS (do not check the box "Mirror Displays").
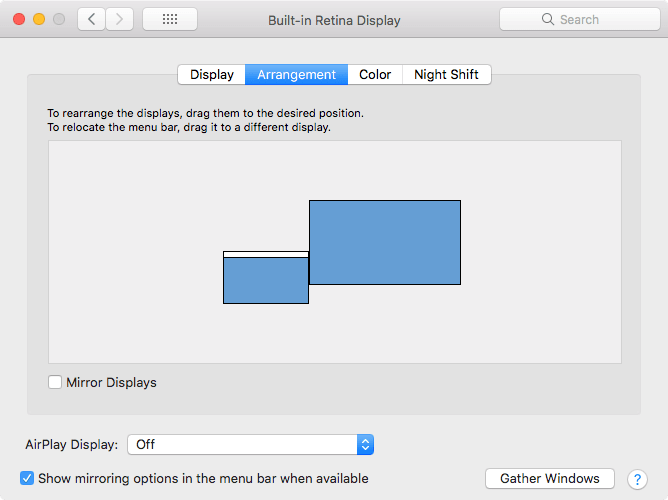
Separate the current display from the external display.
Subsection 7.3.6 yolo: true
Inspired by a random feature request from a tweet by Karthik Ram, the output format
xaringan::moon_reader provided an option named yolo (an acronym of "you only live once"). If you set it to true, a photo of Karl Broman (with a mustache) will be inserted into a random slide in your presentation.3
For the full story behind the mustache, see Karl’s post at
http://kbroman.org/blog/2014/08/28/the-mustache-photo/.
---
output:
  xaringan::moon_reader:
    yolo: true
---
The xaringan package is probably best known for this feature. I want to thank Karl for letting me use this photo. It always makes me happy for mysterious reasons.
A less well-known feature is that you can actually replace Karl’s picture with other pictures, and/or specify how many times you want a picture to randomly show up in your presentation. For example:
4
In case you are also interested in Karl’s great grandfather’s mustache, you can find a picture at
https://twitter.com/kwbroman/status/1199142650185691137.
---
output:
  xaringan::moon_reader:
    yolo:
      img: kangaroo.jpg
      times: 5
---
Developing software is fun, isn’t it?
Section 7.4 Build and preview slides
You can knit the source document like other Rmd documents to view the output, but it may be tedious to have to knit it over and over again whenever you make changes. The other way to preview the slides is the RStudio addin "Infinite Moon Reader" or the function
xaringan::inf_mr(), as mentioned in Section Section 2.2. With this way, you can continuously preview your slides just by saving the source document. The continuous preview is achieved via a local web server launched by the servr package [28].
One distinction of
xaringan::moon_reader when compared to other R Markdown output formats is that it does not generate self-contained HTML documents by default (see Section Subsection 3.1.9). This means none of the external dependencies such as images or JavaScript libraries will be embedded in the HTML output file by default. You can turn the self-contained mode on via:
output:
  xaringan::moon_reader:
    self_contained: true
Due to technical difficulties (remark.js does not use Pandoc but renders Markdown in real time in the browser), it is challenging to implement the self-contained mode really well. Currently, most JavaScript libraries (including remark.js) and CSS files should be correctly embedded in the self-contained mode. Images in slides should also be embedded. The paths of images in slides are identified from
 (Markdown syntax), <img src="PATH" /> (HTML syntax), and background-image: url(PATH) (remark.js syntax for background images). Other types of images will not be discovered or embedded.
If you have to publish the slides to a web server, but xaringan’s self-contained mode fails to identify certain resources and embed them, please feel free to file an issue to the GitHub repository at
https://github.com/yihui/xaringan. If you publish slides to GitHub Pages or Netlify, this may not be a problem, because you can commit or upload all resources files generated or required by the slides.
Section 7.5 CSS and themes
The format
xaringan::moon_reader has a css option, to which you can pass a vector of CSS file paths, e.g.,
---
output:
  xaringan::moon_reader:
    css: ["default", "extra.css"]
---
In theory, the file path should contain the extension
.css. If a path does not contain a filename extension, it is assumed to be a built-in CSS file in the xaringan package. For example, default in the above example means default.css in the package under the path xaringan:::pkg_resource(). To see all built-in CSS files, call xaringan:::list_css() in R.
When you only want to override a few CSS rules in the default theme, you do not have to copy the whole file
default.css; instead, create a new (and hopefully smaller) CSS file that only provides new CSS rules.
Users have contributed a few themes to xaringan. For example, you can use the
metropolis theme (https://github.com/pat-s/xaringan-metropolis):
---
output:
  xaringan::moon_reader:
    css: [default, metropolis, metropolis-fonts]
---
To see all possible themes:
names(xaringan:::list_css())
##  [1] "chocolate-fonts"  "chocolate"
##  [3] "default-fonts"    "default"
##  [5] "duke-blue"        "fc-fonts"
##  [7] "fc"               "glasgow_template"
##  [9] "hygge-duke"       "hygge"
## [11] "ki-fonts"         "ki"
## [13] "kunoichi"         "lucy-fonts"
## [15] "lucy"             "metropolis-fonts"
## [17] "metropolis"       "middlebury-fonts"
## [19] "middlebury"       "nhsr-fonts"
## [21] "nhsr"             "ninjutsu"
## [23] "rladies-fonts"    "rladies"
## [25] "robot-fonts"      "robot"
## [27] "rutgers-fonts"    "rutgers"
## [29] "shinobi"          "tamu-fonts"
## [31] "tamu"             "uio-fonts"
## [33] "uio"              "uo-fonts"
## [35] "uo"               "uol-fonts"
## [37] "uol"              "useR-fonts"
## [39] "useR"             "uwm-fonts"
## [41] "uwm"              "wic-fonts"
## [43] "wic"
If you also want to contribute themes, please read the guide at
https://yihui.name/en/2017/10/xaringan-themes.
Section 7.6 Some tips
Lastly, we present a few tips that may help you make better presentations.
Subsection 7.6.1 Autoplay slides
Slides can be automatically played if you set the
autoplay option under nature (in milliseconds). For example, the next slide can be displayed automatically every 30 seconds in a lightning talk:
---
output:
  xaringan::moon_reader:
    nature:
      autoplay: 30000
---
Subsection 7.6.2 Countdown timer
A countdown timer can be added to every page of the slides using the
countdown option under nature. For example, if you want to spend one minute on every page when you give the talk, you can set:
---
output:
  xaringan::moon_reader:
    nature:
      countdown: 60000
---
Then you will see a timer counting down from
01:00, to 00:59, 00:58, ... When the time is out, the timer will continue but the time turns red.
Subsection 7.6.3 Highlight code lines
The option
highlightLines: true of nature will highlight code lines that start with *, or are wrapped in {{ }}, or have trailing comments #<<:
---
output:
  xaringan::moon_reader:
    nature:
      highlightLines: true
---
Below are a few examples:
```r
if (TRUE) {
* message("Very important!")
}
```

`r ''````{r tidy=FALSE}
if (TRUE) {
{{ message("Very important!") }}
}
```

`r ''````{r tidy=FALSE}
library(ggplot2)
ggplot(mtcars) +
  aes(mpg, disp) +
  geom_point() +   #<<
  geom_smooth()    #<<
```
````
Note that the first way does not give you valid R code in the source document, but the latter two ways provide syntactically valid R code, and in the output slides, you will not see the tokens
{{ }} or #<<. The lines will be highlighted with a yellow background by default.
Subsection 7.6.4 Working offline
To make slides work offline, you need to download a copy of remark.js in advance, because xaringan uses the online version by default. You can use
xaringan::summon_remark() to download the latest or a specified version of remark.js. By default, it is downloaded to libs/remark-latest.min.js.
Then change the
chakra option in the YAML metadata to point to this file, e.g.,
output:
  xaringan::moon_reader:
    chakra: libs/remark-latest.min.js
Making the slides work offline can be tricky, since you may have other dependencies. The remark.js dependency is easy to deal with because it is a single JavaScript file; other dependencies such as MathJax can be extremely tricky. If you used Google web fonts in slides (the default theme uses Yanone Kaffeesatz, Droid Serif, and Source Code Pro), they will not work offline unless you download or install them locally. The Heroku app google-webfonts-helper can help you download fonts and generate the necessary CSS.
Subsection 7.6.5 Macros
The Markdown syntax of remark.js can be amazingly extensible, because it allows users to define custom macros (JavaScript functions) that can be applied to Markdown text using the syntax
![:macroName arg1, arg2, ...] or . For example, you can define a macro named scale to set the width of an image:
remark.macros.scale = function(w) {
  var url = this;
  return '<img src="' + url + '" style="width: ' + w + '" />';
};
Then the Markdown text

will be translated to:
<img src="image.jpg" style="width: 50%" />
Now you should see that you can use cleaner pseudo-Markdown syntax to generate HTML.
To insert macros in xaringan slides, you can save your macros in a file (e.g.,
macros.js), and use the option beforeInit under the option nature, e.g.,
output:
  xaringan::moon_reader:
    nature:
      beforeInit: "macros.js"
The
beforeInit option can be used to insert arbitrary JavaScript code before remark.js initializes the slides. Inserting macros is just one of its possible applications. For example, when you embed tweets from Twitter in slides, usually you need to load https://platform.twitter.com/widgets.js, which can be loaded via the beforeInit option.
Subsection 7.6.6 Disadvantages
The xaringan package was originally designed for "ninja", meaning that if you know CSS, you will be able to freely customize the style, otherwise you can only accept the default themes. Playing with CSS can be fun and rewarding, but it can also easily waste your time. Your aesthetic standards and taste may change from time to time, and you could end up tweaking the styles all the time.
The HTML output file generated from xaringan is not self-contained by default, as we mentioned in Section Section 7.4. The self-contained mode of xaringan may not work perfectly.
HTML widgets may not work well in xaringan. This might be improved in the future, but it is a little tricky technically.
When printing the slides to PDF from Google Chrome (see Section Subsection 4.1.10), I recommend that you open the slides and go through all pages at least once, to make sure all content has been rendered in the browser. Without navigating through all slides manually once, some content may not be printed correctly (such as MathJax expressions and HTML widgets).
