Chapter 10 Websites
Most R Markdown applications are single documents. That is, you have a single R Markdown source document, and it generates a single output file. However, it is also possible to work with multiple Rmd documents in a project, and organize them in a meaningful way (e.g., pages can reference each other).
Currently there are two major ways to build multiple Rmd documents: blogdown [7] [10] for building websites, and bookdown [6] [12] for authoring books. In this chapter, we briefly introduce the blogdown package. For the full reference, please read the official blogdown book [7]. In fact, the rmarkdown package also has a built-in site generator, which was not covered in detail by the blogdown book, so we will introduce it in Section 10.5.
With blogdown, you can write a blog post or a general page in an Rmd document, or a plain Markdown document. These source documents will be built into a static website, which is essentially a folder containing static HTML files and associated assets (such as images and CSS files). You can publish this folder to any web server as a website. Because it is only a single folder, it can be easy to maintain. For example, you do not need to worry about databases as you do if you use dynamic systems like WordPress.
Because the website is generated from R Markdown, the content is more likely to be reproducible, and also easier to maintain (no cut-and-paste of results). Using Markdown means your content could be more portable in the sense that you may convert your pages to PDF or other formats in the future, and you are not tied to the default HTML format. For example, you may be able to convert a blog post to a journal paper, or several posts to a book. One more benefit of using blogdown is that the Markdown syntax is based on bookdown’s extended syntax, which means it is highly suitable for technical writing. For example, you may write math equations, insert figures or tables with captions, cross-reference them with figure or table numbers, add citations, and present theorems or proofs.
Section 10.1 Get started
You can install blogdown from CRAN. If you want to test the development version, you may also install it from GitHub:
# from CRAN
install.packages("blogdown")

# or the development version from GitHub
devtools::install_github("rstudio/blogdown")
The easiest way to get started with a blogdown-based website is to create a website project from RStudio:
File -> New Project. If you do not use RStudio, you may call the function blogdown::new_site().
The first time when you create a new website, blogdown will do a series of things behind the scenes: it downloads Hugo (the default static site generator), creates a website skeleton, installs a theme, adds some example posts, builds the site, and serves it so that you can see the website in your browser (or RStudio Viewer if you are in RStudio). It will not go through all these steps again the next time when you work on this website. All you need in the future is
blogdown::serve_site(), or equivalently, the RStudio addin “Serve Site”.
Every time you open a website project, you only need to serve the site once, and blogdown will keep running in the background, listening to changes in your source files, and rebuilding the website automatically. All you have to do is create new posts, or edit existing posts, and save them. You will see the automatic live preview as you save the changes (unless you have errors in a source document).
There are a few RStudio addins to help you author your posts: you can use the “New Post” addin to create a new post, the “Update Metadata” addin to update the YAML metadata of a post, and the “Insert Image” addin to insert an image in a post.
Section 10.2 The directory structure
The default site generator in blogdown is Hugo (https://gohugo.io). A basic Hugo website usually contains the following files and directories:
-
config.toml -
content/ -
static/ -
themes/ -
public/
The configuration file
config.toml can be used to specify options for the Hugo website, e.g.,
baseURL = "/"
languageCode = "en-us"
title = "A Hugo website"
theme = "hugo-lithium-theme"
Some options are provided by Hugo itself, such as
title and baseURL; you may refer to https://gohugo.io/getting-started/configuration/ for all built-in options. Some options are provided by the Hugo theme, and you need to read the documentation of the specific theme to know the additional options.
All source Markdown or R Markdown files should be placed under the
content/ directory. The directory structure under content/ can be arbitrary.
The
static/ directory contains static assets such as images and CSS files. Everything under static/ will be copied to the public/ directory when Hugo generates the website. For example, static/images/foo.png will be copied to public/images/foo.png, and if you want to include this image in your post, you may use  in Markdown (the leading / typically indicates the root of public/).
You can download multiple themes to the
themes directory. To activate a theme, specify its folder name in the theme option in config.toml. You can find a lot of Hugo themes from https://themes.gohugo.io. Remember, the best theme is always the next one, i.e., one that you have not used before. I recommend that you start with a simple theme (such as the default hugo-lithium theme in blogdown, hugo-xmin, or hugo-tanka), and write a substantial number of posts before seriously investing time in choosing or tweaking a theme.
After you serve a site using blogdown, your site will be continuously built to the
public/ directory by default. You can upload this folder to any web server to deploy the website. However, if you know GIT, there is an even easier way to publish your website, to be introduced in the next section.
Hugo is very powerful and customizable. If you want to learn more technical details about it, you may read Chapter 2 of the blogdown book (online).
Section 10.3 Deployment
There are multiple ways to deploy a website, such as using your own web server, GitHub Pages, or Amazon S3. We only mention one in this chapter: Netlify (https://www.netlify.com). It provides both free and paid plans. For personal users, the free plan may be enough, because many useful features have been included in the free plan, e.g., the Hugo support, CDN (content delivery network) for high availability and performance of your website, HTTPS, binding your custom domain, and 301/302 redirects.
Netlify currently supports GitHub, GitLab, and Bitbucket. You may log in using one of these accounts at https://app.netlify.com, and create a new website from your GIT repository that contains the source of your website. Note that you do not need to commit or push the
public/ directory in GIT (in fact, I recommend that you ignore this directory in .gitignore).
When creating a new site on Netlify, you can specify the build command to be
hugo, the publish directory to be public (unless you changed the setting publishDir in config.toml), and also add an environment variable HUGO_VERSION with a value of a suitable Hugo version (e.g., 0.39). To find the Hugo version on your local computer, call the function blogdown::hugo_version(). You may want to use the same Hugo version on Netlify.
Netlify will assign a random subdomain of the form
xxx-xxx-1234.netlify.com to you. You may change it to a meaningful domain name, or request a free *.rbind.io domain name from https://github.com/rbind/support/issues if you like it.
If possible, I strongly recommend that you enable HTTPS for your websites (why?). HTTPS is free on Netlify, so you really do not have a reason not to enable it.
Once your GIT repository is connected with Netlify, you only need to push source files to the repository in the future, and Netlify will automatically rebuild your website. This is called “continuous deployment”.
Section 10.4 Other site generators
Currently blogdown has limited support for two other popular site generators: Jekyll and Hexo. You can find detailed instructions on how to configure blogdown for these site generators in Chapter 5 of the blogdown book (online). Note that neither Pandoc’s Markdown nor HTML widgets are supported if you use Jekyll or Hexo with blogdown.
Section 10.5 rmarkdown’s site generator
Before blogdown was invented, the rmarkdown package had provided a simple site generator that did not rely on a third-party site generator like Hugo. If you feel Hugo is too complex for you, and you only want to build a few Rmd documents into a website, this built-in site generator may be a good choice. A main restriction of this site generator is that it assumes all Rmd documents are under a flat directory (i.e., no pages under subdirectories). It also has fewer features compared to Hugo (e.g., no RSS feeds).
You can render collections of R Markdown documents as a website using the
rmarkdown::render_site() function. We will call such websites “R Markdown websites” in this section. The RStudio IDE (version 1.0 or higher) also includes integrated support for developing R Markdown websites.
Subsection 10.5.1 A simple example
To start with, let’s walk through a very simple example, a website that includes two pages (“Home” and “About”) and a navigation bar to switch between them.
First, we need a configuration file
_site.yml:
name: "my-website"
navbar:
  title: "My Website"
  left:
    - text: "Home"
      href: index.html
    - text: "About"
      href: about.html
Then two Rmd files,
index.Rmd:
---
title: "My Website"
---

Hello, Website!
and
about.Rmd:
---
title: "About This Website"
---

More about this website.
Note that the minimum requirement for any R Markdown website is that it have an
index.Rmd file as well as a _site.yml file. If you execute the rmarkdown::render_site() function from within the directory containing the website, the following will occur:
-
All of the
*.Rmdand*.mdfiles in the root website directory will be rendered into HTML. Note, however, that Markdown files beginning with_are not rendered (this is a convention to designate files that are to be included by top level Rmd documents as child documents). -
The generated HTML files and any supporting files (e.g., CSS and JavaScript) are copied into an output directory (
_siteby default).
The HTML files within the
_site directory are now ready to deploy as a standalone static website.
The full source code for the simple example above can be found in the
hello-website folder in the repository https://github.com/rstudio/rmarkdown-website-examples.
Subsection 10.5.2 Site authoring
Subsubsection 10.5.2.1 RStudio
RStudio includes a variety of features intended to make developing R Markdown websites more productive.
All of the RStudio features for website authoring described below require the use of an RStudio Project tied to your website’s directory. See the documentation on RStudio Projects for additional information on how to create and use projects.
As you work on the individual pages of your website, you can render them using the
Knit button just as you do with conventional standalone R Markdown documents (see Figure 10.1).
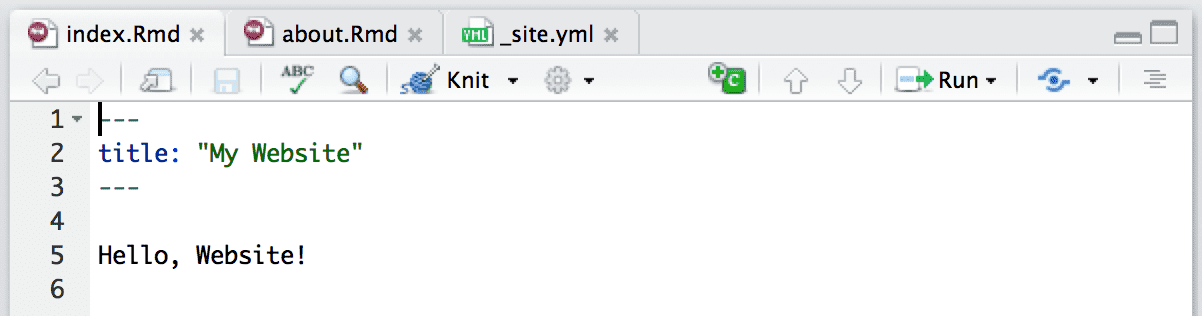
Knit a single page of a website.
Knitting an individual page will only render and preview that page, not the other pages in the website.
To render all of the pages in the website, you use the
Build pane, which calls rmarkdown::render_site() to build and then preview the entire site (see Figure 10.2).
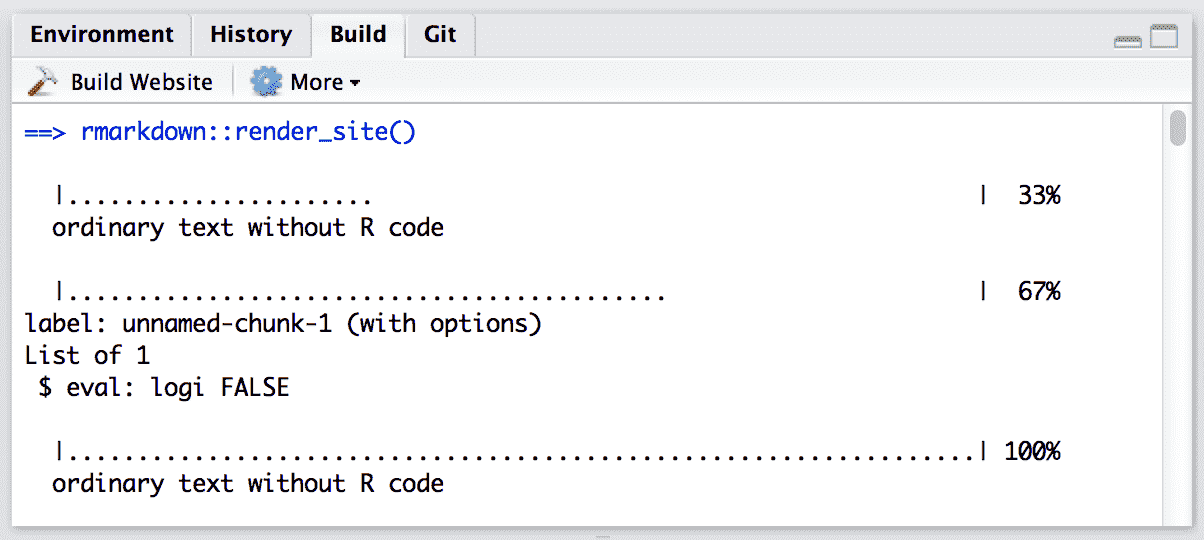
Build an entire website in RStudio.
RStudio supports “live preview” of changes that you make to supporting files within your website (e.g., CSS, JavaScript, Rmd partials, R scripts, and YAML config files).
Changes to CSS and JavaScript files always result in a refresh of the currently active page preview. Changes to other files (e.g., shared scripts and configuration files) trigger a rebuild of the active page (this behavior can be disabled via the options dialog available from the
Build pane).
Note that only the active page is rebuilt, so once you are happy with the results of rendering you should make sure to rebuild the entire site from the
Build pane to ensure that all pages inherit your changes.
When working iteratively on a page, you might find it more convenient to preview it side-by-side with the editor rather than in an external window. You can configure RStudio to do this using the options menu on the editor toolbar (see Figure 10.3).
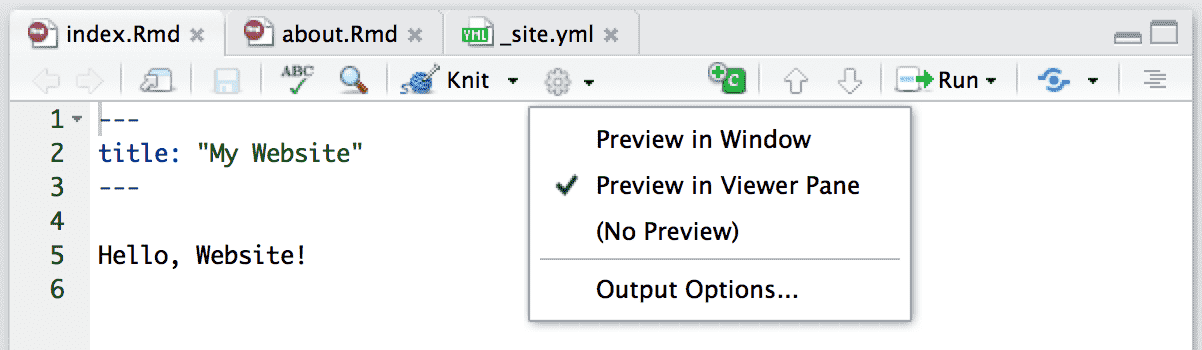
Preview a page side-by-side with the editor in RStudio.
Subsubsection 10.5.2.2 Command line
If you are not working within RStudio and/or want to build sites from the command line, you can call the
render_site() function directly from within the website directory. Pass no arguments to render the entire site or a single file in order to render just that file:
# render the entire site
rmarkdown::render_site()

# render a single file only
rmarkdown::render_site("about.Rmd")
To clean up all of the files generated via
render_site(), you can call the clean_site() function, which will remove all files generated by rendering your site’s Markdown documents, including knitr’s *_cache directories. You can specify the preview = TRUE option to just list the files to be removed rather than actually removing them:
# list which files will be removed
rmarkdown::clean_site(preview = TRUE)

# actually remove the files
rmarkdown::clean_site()
Subsubsection 10.5.2.3 knitr caching
If your website is time consuming to render, you may want to enable knitr’s caching during the development of the site, so that you can more rapidly preview. To enable caching for an individual chunk, just add the
cache = TRUE chunk option:
```{r, cache = TRUE}
data <- longComputation()
```
To enable caching for an entire document, add
cache = TRUE to the global chunk option defaults:
```{r setup, include=FALSE}
knitr::opts_chunk$set(cache = TRUE)
```
Note that when caching is enabled for an Rmd document, its
*_files directory will be copied rather than moved to the _site directory (since the cache requires references to generated figures in the *_files directory).
Subsection 10.5.3 Common elements
Subsubsection 10.5.3.1 Content
Typically when creating a website, there are various common elements you want to include on all pages (e.g., output options, CSS styles, header and footer elements, etc.). Here are additions in three files to the example above to make use of common elements:
_site.yml:
name: "my-website"
navbar:
  title: "My Website"
  left:
    - text: "Home"
      href: index.html
    - text: "About"
      href: about.html
output:
  html_document:
    theme: cosmo
    highlight: textmate
    include:
      after_body: footer.html
    css: styles.css
footer.html:
<p>Copyright © 2016 Skynet, Inc. All rights reserved.</p>
styles.css:
blockquote {
  font-style: italic
}
Note that we have included an
output element within our _site.yml file. This defines shared output options for all R Markdown documents within a site. Note that individual documents can also include their own output options, which will be merged with the common options at render time.
As part of our common output options, we have specified an HTML footer (via the
include: after-body: option) and a CSS stylesheet. You can also include HTML before the body or in the document’s <head> tag (see Subsubsection 3.1.10.2).
In addition to whatever common options you define, there are two output options that are automatically set when rendering a site:
These options are set so that dependent files (e.g., jQuery, Bootstrap, and HTML widget libraries) are shared across all documents within the site rather than redundantly embedded within each document.
Subsubsection 10.5.3.2 R scripts
If you have R code that you would like to share across multiple R Markdown documents within your site, you can create an R script (e.g.,
utils.R) and source it within your Rmd files. For example:
```{r}
source("utils.R")
```
Subsubsection 10.5.3.3 Rmd partials
You may have common fragments of R Markdown that you want to share across pages within your site. To share Rmd fragments, you should name them with a leading underscore (
_), and then include them within their parent Rmd document using the child chunk option. For example:
about.Rmd:
---
title: "About This Website"
---

More about this website.

```{r, child="_session-info.Rmd"}
```
_session-info.Rmd:
Session information:

```{r}
sessionInfo()
```
The leading underscore is an indicator to the site generation engine that the Rmd is a partial document to be included in other documents, so it is not compiled as a standalone document during site rendering.
The full source code for the above example can be found in the
common-element folder in the repository https://github.com/rstudio/rmarkdown-website-examples.
Subsection 10.5.4 Site navigation
The
navbar element of _site.yml can be used to define a common navigation bar for your website. You can include internal and external links on the navigation bar as well as drop-down menus for sites with a large number of pages.
Here is a navigation bar definition in
_site.yml that makes use of a variety of features:
name: "my-website"
navbar:
  title: "My Website"
  type: inverse
  left:
    - text: "Home"
      icon: fa-home
      href: index.html
    - text: "About"
      icon: fa-info
      href: about.html
    - text: "More"
      icon: fa-gear
      menu:
        - text: "Heading 1"
        - text: "Page A"
          href: page-a.html
        - text: "Page B"
          href: page-b.html
        - text: "---------"
        - text: "Heading 2"
        - text: "Page C"
          href: page-c.html
        - text: "Page D"
          href: page-d.html
  right:
    - icon: fa-question fa-lg
      href: https://example.com
This example demonstrates a number of capabilities of navigation bars:
-
You can use the
typefield to choose between thedefaultandinversenavigation bar styles (each theme includes distinct colors for “default” and “inverse” navigation bars). -
You can include menus on the navigation bar, and those menus can have separators (
text: "--------------") and internal headings (textwithout a correspondinghref). -
You can include both internal and external links on the navigation bar.
-
You can use icons on the navigation bar. Icons from three different icon sets are available: Font Awesome, Ionicons, and Bootstrap Glyphicons. When referring to an icon, you should use its full name including the icon set prefix (e.g.,
fa-github,ion-social-twitter, andglyphicon-time).
Subsubsection 10.5.4.1 HTML navigation bar
If you want to have even more control over the appearance and behavior of the navigation bar, you can define it in HTML rather than YAML. If you include a file named
_navbar.html in your website directory, it will be used as the navigation bar. Here is an example of navigation bar defined in HTML: https://github.com/rstudio/rmarkdown-website/blob/master/_navbar.html.
Full documentation on syntax of Bootstrap navigation bars can be found here: http://getbootstrap.com/components/.
Subsection 10.5.5 HTML generation
R Markdown includes many facilities for generation of HTML content from R objects, including:
-
The conversion of standard R output types (e.g., textual output and plots) within code chunks done automatically by knitr.
-
A variety of ways to generate HTML tables, including the
knitr::kable()function and other packages such as kableExtra and pander. -
A large number of available HTML widgets that provide rich JavaScript data visualizations.
As a result, for many R Markdown websites you will not need to worry about generating HTML output at all (since it is created automatically).
Subsubsection 10.5.5.1 The htmltools package
If the facilities described above do not meet your requirements, you can also generate custom HTML from your R code using the htmltools package [16]. The htmltools package enables you to write HTML using a convenient R based syntax (this is the same core HTML generation facility used by the shiny package).
Here is an example of an R function that creates a Bootstrap thumbnail div:
library(htmltools)
thumbnail <- function(title, img, href, caption = TRUE) {
  div(class = "col-sm-4",
      a(class = "thumbnail", title = title, href = href,
        img(src = img),
        div(class = if (caption) "caption",
            if (caption) title)
      )
  )
}
You can write functions that build HTML like the one above, then call them from other R code that combines them with your data to produce dynamic HTML. An R code chunk that makes use of this function might look like this:
thumbnail("Apple", "images/apple.png",
          "https://en.wikipedia.org/wiki/Apple")
thumbnail("Grape", "images/grape.png",
          "https://en.wikipedia.org/wiki/Grape")
thumbnail("Peach", "images/peach.png",
          "https://en.wikipedia.org/wiki/Peach")
Subsection 10.5.6 Site configuration
The
_site.yml file has a number of options that affect site output, including where it is written and what files are included and excluded from the site. Here is an example that makes use of a few of these options:
name: "my-website"
output_dir: "_site"
include: ["import.R"]
exclude: ["docs.txt", "*.csv"]
The
name field provides a suggested URL path for your website when it is published (by default this is just the name of the directory containing the site).
The
output_dir field indicates which directory to copy site content into ("_site" is the default if none is specified). It can be "." to keep all content within the root website directory alongside the source code.
Subsubsection 10.5.6.1 Included files
The
include and exclude fields enable you to override the default behavior vis-a-vis what files are copied into the output directory. By default, all files within the website directory are copied into the output directory save for the following:
-
Files beginning with
.(hidden files). -
Files beginning with
_. -
Files known to contain R source code (e.g.,
*.R,*.s,*.Rmd), R data (e.g.,*.RData,*..rds), or configuration data (e.g.,*..Rproj,rsconnect).
The
include and exclude fields of _site.yml can be used to override this default behavior (wildcards can be used to specify groups of files to be included or excluded).
Note that
include and exclude are not used to determine which Rmd files are rendered: all of them in the root directory save for those named with the _ prefix will be rendered.
Subsection 10.5.7 Publishing websites
R Markdown websites are static HTML sites that can be deployed to any standard web server. All site content (generated documents and supporting files) are copied into the
_site directory, so deployment is simply a matter of moving that directory to the appropriate directory of a web server.
Subsection 10.5.8 Additional examples
Here are some additional examples of websites created with R Markdown:
-
The rmarkdown documentation: https://rmarkdown.rstudio.com. This website was created using R Markdown. There are a large number of pages (over 40) that are organized using sub-menus on the navigation bar. Disqus comments are included on each page via an
after_bodyoption. The source code is at https://github.com/rstudio/rmarkdown/tree/gh-pages. -
The flexdashboard documentation: https://rmarkdown.rstudio.com/flexdashboard/. It illustrates using an R script to dynamically generate HTML thumbnails of flexdashboard examples from YAML. The source code is at https://github.com/rstudio/rmarkdown/tree/gh-pages/flexdashboard.
Subsection 10.5.9 Custom site generators
So far we have described the behavior of the default site generation function,
rmarkdown::default_site(). It is also possible to define a custom site generator that has alternate behaviors.
Subsubsection 10.5.9.1 Site generator function
A site generator is an R function that is bound to by including it in the
site: field of the index.Rmd or index.md file. For example:
---
title: "My Book"
output: bookdown::gitbook
site: bookdown::bookdown_site
---
A site generation function should return a list with the following elements:
-
name: The name for the website (e.g., the parent directory name). -
output_dir: The directory where the website output is written to. This path should be relative to the site directory (e.g.,"."or"_site"). -
render: An R function that can be called to generate the site. The function should accept theinput_file,output_format,envir,quiet, andencodingarguments. -
clean: An R function that returns relative paths to the files generated byrender_site(). These files are the ones to be removed by theclean_site()function.
Note that the
input_file argument will be NULL when the entire site is being generated. It will be set to a specific filename if a front-end tool is attempting to preview it (e.g., RStudio IDE via the Knit button).
When
quiet = FALSE, the render function should also print a line of output using the message() function indicating which output file should be previewed. For example:
if (!quiet)
  message("\nOutput created: ", output)
Emitting this line enables front-ends like RStudio to determine which file they should open to preview the website.
Subsubsection 10.5.9.2 Examples
See the source code of the
rmarkdown::default_site function for an example of a site generation function. The bookdown package also implements a custom site generator via its bookdown::bookdown_site function.
