Section 10.1 Introduction to R-Studio
Joseph J. Allaire is a serial entrepreneur, software engineer, and the originator of some remarkable software products including “ColdFusion,” which was later sold to the web media tools giant Macromedia and Windows Live Writer, a Microsoft blogging tool. Starting in 2009, Allaire began working with a small team to develop an open source program that enhances the usability and power of R.
As mentioned in previous chapters, R is an open source program, meaning that the source code that is used to create a copy of R to run on a Mac, Windows, or Linux computer is available for all to inspect and modify. As with many open source projects, there is an active community of developers who work on R, both on the basic program itself and the many pieces and parts that can be added onto the basic program. One of these add-ons is R-Studio. R-Studio is an Integrated Development Environment, abbreviated as IDE. Every software engineer knows that if you want to get serious about building something out of code, you must use an IDE. If you think of R as a piece of canvas rolled up and laying on the floor, R-Studio is like an elegant picture frame. R hangs in the middle of R studio, and like any good picture frame, enhances our appreciation of what is inside it.
The website for R-studio is http://www.rstudio.org/ and you can inspect the information there at any time. For most of the rest of this chapter, if you want to follow along with the installation and use of R-Studio, you will need to work on a Mac, Windows, or Linux computer.
Before we start that, let’s consider why we need an IDE to work with R. In the previous chapters, we have typed a variety of commands into R, using what is known as the “R console.” Console is an old technology term that dates back to the days when computers were so big that they each occupied their own air conditioned room. Within that room there was often one “master control station” where a computer operator could do just about anything to control the giant computer by typing in commands. That station was known as the console. The term console is now used in many cases to refer to any interface where you can directly type in commands. We’ve typed commands into the R console in an effort to learn about the R language as well as to illustrate some basic principles about data structures and statistics.
If we really want to “do” data science, though, we can’t sit around typing commands every day. First of all, it will become boring very fast. Second of all, whoever is paying us to be a data scientist will get suspicious when he or she notices that we are retyping some of the commands we typed yesterday. Third, and perhaps most important, it is way too easy to make a mistake - to create what computer scientists refer to as a bug - if you are doing every little task by hand. For these reasons, one of our big goals within this book is to create something that is reusable: where we can do a few clicks or type a couple of things and unleash the power of many processing steps. Using an IDE, we can build these kinds of reusable pieces. The IDE gives us the capability to open up the process of creation, to peer into the component parts when we need to, and to close the hood and hide them when we don’t. Because we are working with data, we also need a way of closely inspecting the data, both its contents and its structure. As you probably noticed, it gets pretty tedious doing this at the R console, where almost every piece of output is a chunk of text and longer chunks scroll off the screen before you can see them. As an IDE for R, R-Studio allows us to control and monitor both our code and our text in a way that supports the creation of reusable elements.
Before we can get there, though, we have to have R-Studio installed on a computer. Perhaps the most challenging aspect of installing R-Studio is having to install R first, but if you’ve already done that in chapter 2, then R-Studio should be a piece of cake. Make sure that you have the latest version of R installed before you begin with the installation of R-studio. There is ample documentation on the R-studio website, http://www.rstudio.org/, so if you follow the instructions there, you should have minimal difficulty. If you reach a page where you are asked to choose between installing R-studio server and installing R-studio as a desktop application on your computer, choose the latter. We will look into R-studio server a little later, but for now you want the desktop/single user version. If you run into any difficulties or you just want some additional guidance about R-studio, you may want to have a look at the book entitled, Getting Started with R-studio, by John Verzani (2011, Sebastopol, CA: O’Reilly Media). The first chapter of that book has a general orientation to R and R-studio as well as a guide to installing and updating R-studio. There is also a YouTube video that introduces R-studio here: http://www.youtube.com/watch?v=7sAmqkZ3Be8 Be aware if you search for other YouTube videos that there is a disk recovery program as well a music group that share the R-Studio name: You will get a number of these videos if you search on “R-Studio” without any other search terms.
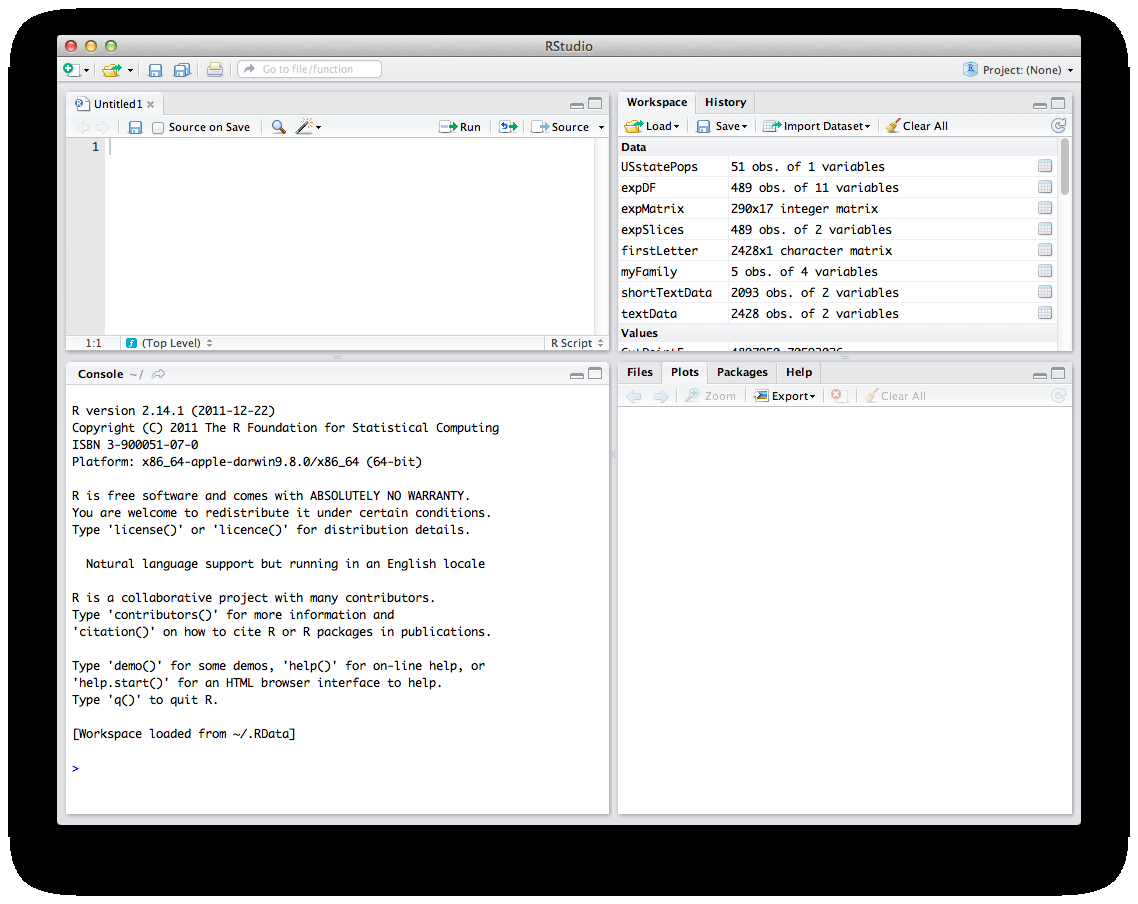
Once you have installed R-Studio, you can run it immediately in order to get started with the activities in the later parts of this chapter. Unlike other introductory materials, we will not walk through all of the different elements of the R-Studio screen. Rather, as we need each feature we will highlight the new aspect of the application. When you run R-Studio, you will see three or four sub-windows. Use the File menu to click “New” and in the sub-menu for “New” click “R Script.” This should give you a screen that looks something like this: