Section 2.11 Web Scraping
We’ve mentioned previously that there is a lot of data on the Internet, which probably comes at no surprise given the vast amount of information on the Internet. Sometimes these data are in a nice CSV format that we can quickly pull from the Internet. Sometimes, the data are spread across a web page, and it’s our job to "scrape" that information from the webpage and get it into a usable format. Knowing first that this is possible within R and second, having some idea of where to start is an important start to beginning to get data from the Internet.
We’ll walk through three R packages in this lesson to help get you started in getting data from the Internet. Let’s transition a little bit to talking about how to pull pieces of data from a website, when the data aren’t (yet!) in the format that we want them.
Say you wanted to start a company but did not know exactly what people you would need. We could go to the websites of a bunch of companies similar to the company you hope to start and pull off all the names and titles of the people working there. You then compare the titles across companies and voila, you’ve got a better idea of who you’ll need at your new company.
You could imagine that while this information may be helpful to have, getting it manually would be a pain. Navigating to each site individually, finding the information, copying and pasting each name. That sounds awful! Thankfully, there’s a way to scrape the web from R directly!
A very helpful package
rvest can help us do this. It gets its name from the word "harvest." The idea here is you’ll use this package to "harvest" information from websites! However, as you may imagine, this is less straightforward than pulling data that are already formatted the way you want them (as we did previously), since we’ll have to do some extra work to get everything in order.
Subsection 2.11.1 rvest Basics
When
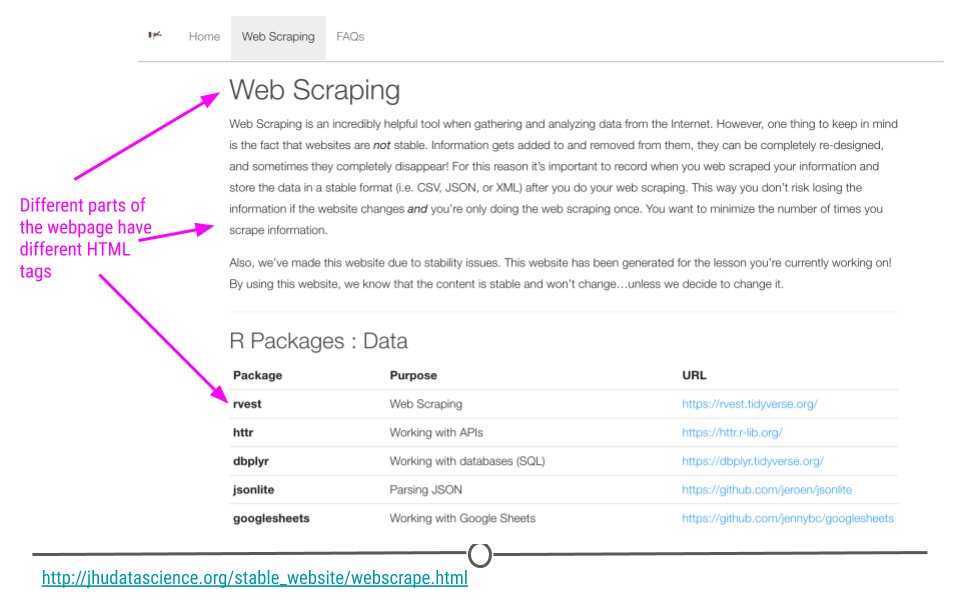
rvest is given a webpage (URL) as input, an rvest function reads in the HTML code from the webpage. HTML is the language websites use to display everything you see on the website. Generally, all HTML documents require each webpage to have a similar structure. This structure is specified by using different tags. For example, a header at the top of your webpage would use a specific tag. Website links would use a different tag. These different tags help to specify how the website should appear. The rvest package takes advantage of these tags to help you extract the parts of the webpage you’re most interested in. So let’s see exactly how to do that all of this with an example.
Subsection 2.11.2 SelectorGadget
To use
rvest, there is a tool that will make your life a lot easier. It’s called SelectorGadget. It’s a "javascript bookmarklet." What this means for us is that we’ll be able to go to a webpage, turn on SelectorGadget, and help figure out how to appropriately specify what components from the webpage we want to extract using rvest.
To get started using SelectorGadget, you’ll have to enable the Chrome Extension.
To enable SelectorGadget using Google Chrome:
-
Click "ADD TO CHROME"
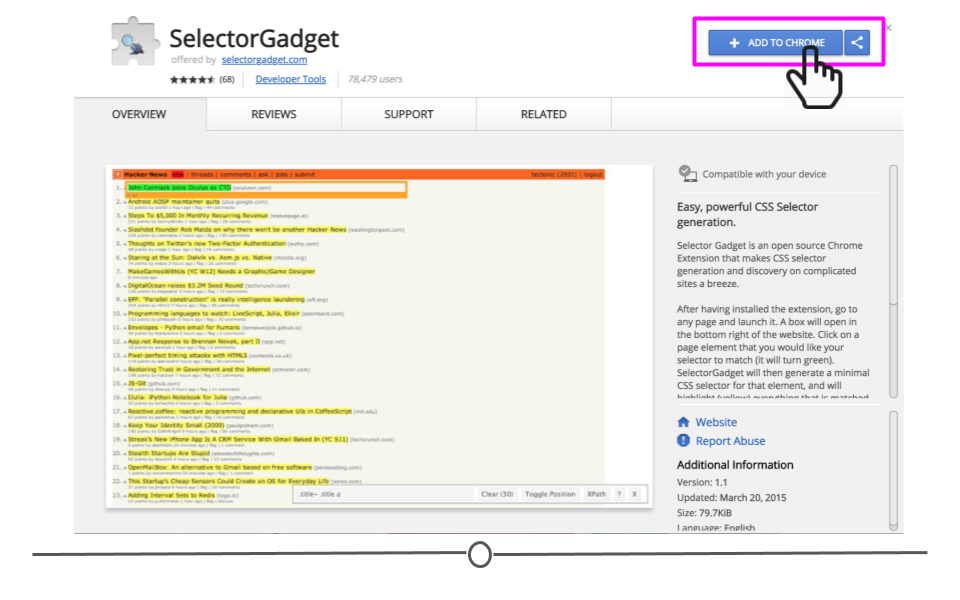
Figure 2.11.2. ADD TO CHROME -
Click "Add extension"
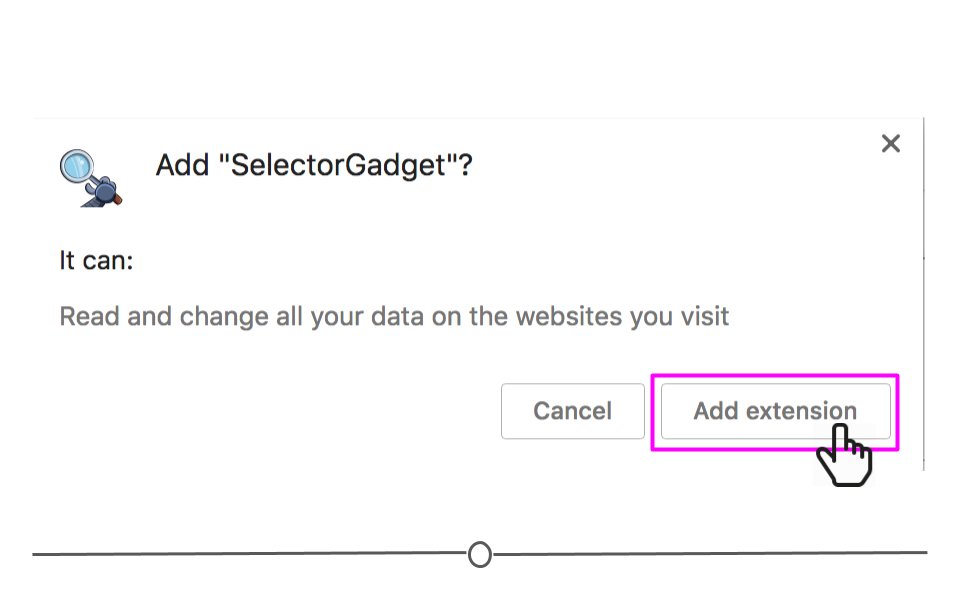
Figure 2.11.3. Add extension -
SelectorGadget’s icon will now be visible to the right of the web address bar within Google Chrome. You will click on this to use SelectorGadget in the example below.
Subsection 2.11.3 Web Scraping Example
Similar to the example above, what if you were interested in knowing a few recommended R packages for working with data? Sure, you could go to a whole bunch of websites and Google and copy and paste each one into a Google Sheet and have the information. But, that’s not very fun!
Alternatively, you could write and run a few lines of code and get all the information that way! We’ll do that in the example below.
Subsubsection 2.11.3.1 Using SelectorGadget
To use SelectorGadget, navigate to the webpage we’re interested in scraping: https://datatrail-jhu.github.io/stable_website/webscrape.html and toggle SelectorGadget by clicking on the SelectorGadget icon. A menu at the bottom-right of your web page should appear.
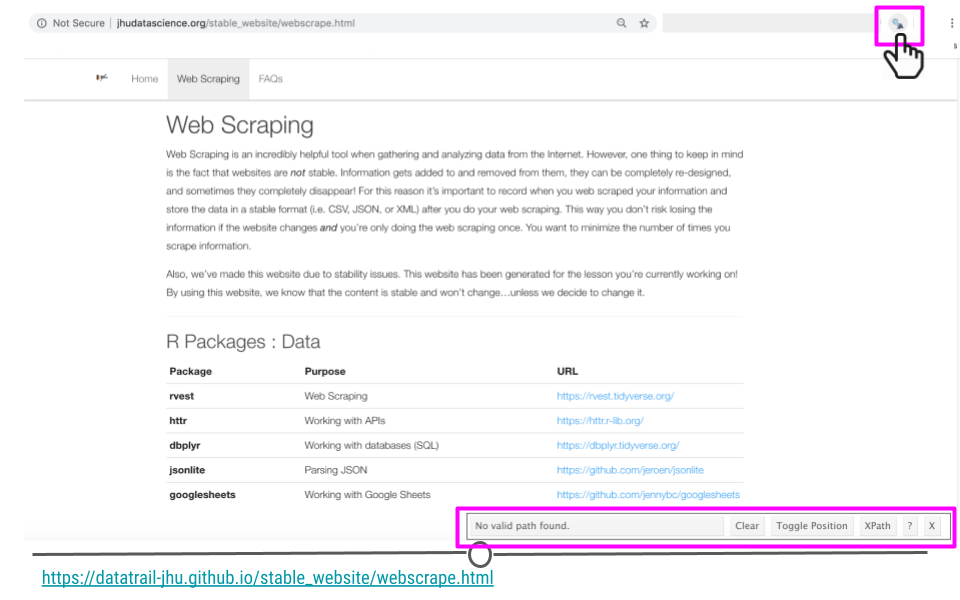
Now that SelectorGadget has been toggled, as you mouse over the page, colored boxes should appear. We’ll click on the the name of the first package to start to tell SelectorGadget which component of the webpage we’re interested in.
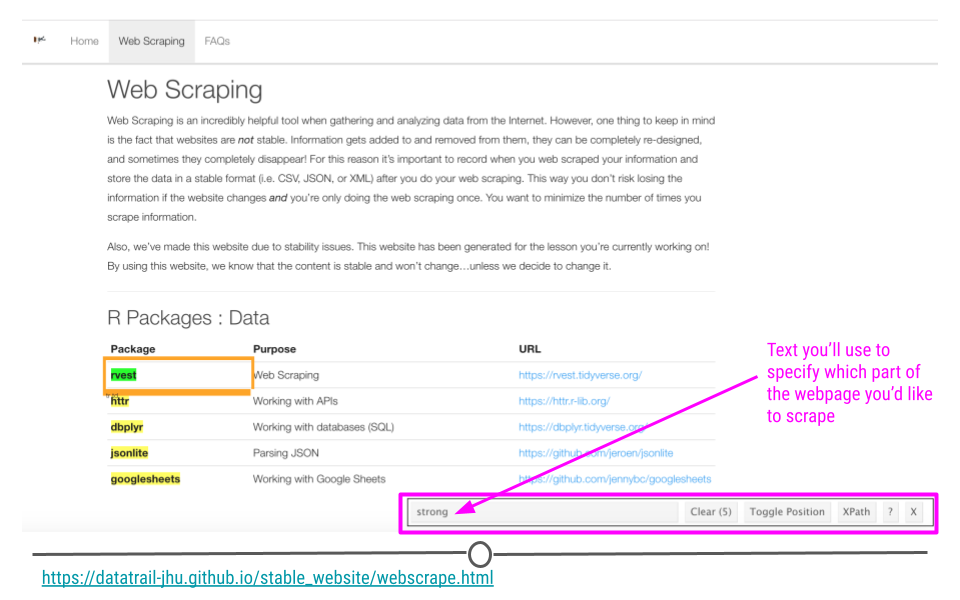
An orange box will appear around the component of the webpage you’ve clicked. Other components of the webpage that SelectorGadget has deemed similar to what you’ve clicked will be highlighted. And, text will show up in the menu at the bottom of the page letting you know what you should use in
rvest to specify the part of the webpage you’re most interested in extracting.
Here, we see with that SelectorGadget has highlighted the package names and nothing else! Perfect. That’s just what we wanted. Now we know how to specify this element in
rvest!
Subsubsection 2.11.3.2 Using rvest
Now we’re ready to use
rvest’s functions. First, we’ll use read_html() (which actually comes from the xml2 package) to read in the HTML from our webpage of interest.
We’ll then use
html_nodes() to specify which parts of the webpage we want to extract. Within this function we specify "strong", as that’s what SelectorGadget told us to specify to "harvest" the information we’re interested in.
Finally
html_text() extracts the text from the tag we’ve specified, giving us that list of packages we wanted to see!
## load package
# install.packages("rvest")
library(rvest) # this loads the xml2 package too!

## provide URL
packages <- read_html("https://datatrail-jhu.github.io/stable_website/webscrape.html") # the function is from xml2

## Get Packages
packages %>%
  html_nodes("strong") %>%
  html_text()
## [1] "rvest" "httr" "dbplyr" "jsonlite" "googlesheets"
With just a few lines of code we have the information we were looking for!
Subsection 2.11.4 A final note: SelectorGadget
SelectorGadget selected what we were interested in on the first click in the example above. However, there will be times when it makes its guess and highlights more than what you want to extract. In those cases, after the initial click, click on any one of the items currently highlighted that you don’t want included in your selection. SelectorGadget will mark that part of the webpage in red and update the menu at the bottom with the appropriate text. To see an example of this, watch this short video here.

